Whether you hop on a plane to a new destination regularly or just love documenting your local adventures, there’s a good chance you’ll be taking loads of pictures! In this guide, I’ll be covering how to take better travel photos. No matter what camera or gear you’re using, these travel photography tips will be sure to help you level up your photography game and take better travel photos!
Disclaimer: This blog post may feature some affiliate links, which means I get a small commission if you make a purchase (at no extra cost to you). It’s one of the ways I can keep producing free guides and resources for my readers. Learn more about my affiliate policy here. Thank you for the support!
How To Take Better Travel Photos: Expert Tips and Tricks
I started taking travel photos about 15 years ago but only invested in my first professional camera in 2015. Fast forward to 2016 and I quit my 9-5 day job to start my own business and take travel photography full time. Since then I have partnered with some of the world’s biggest brands on photo projects, have had photos published in numerous magazines, and have also published my own coffee-table photo book. I’m 100% self-taught and haven’t gone to college for photography. There is SO much you can learn these days via the internet, in-person workshops, and by practicing.
So let me pass on some of the things I have learned about how to take amazing travel photos! This guide is aimed at all skill levels and for those with any type of camera (including phone photography). These tips are also for photographers and people who like to collaborate with photographers for their travel photos. I feature in a lot of my own travel photos and that’s because I partner with my husband and friends to create these images. Knowing more about what makes a good photo will help you guide your photographer/partner/friend to capture the best photos possible. Or you can use these tips to take your own self-portraits with a tripod! Let’s jump into it my top travel photography tips!
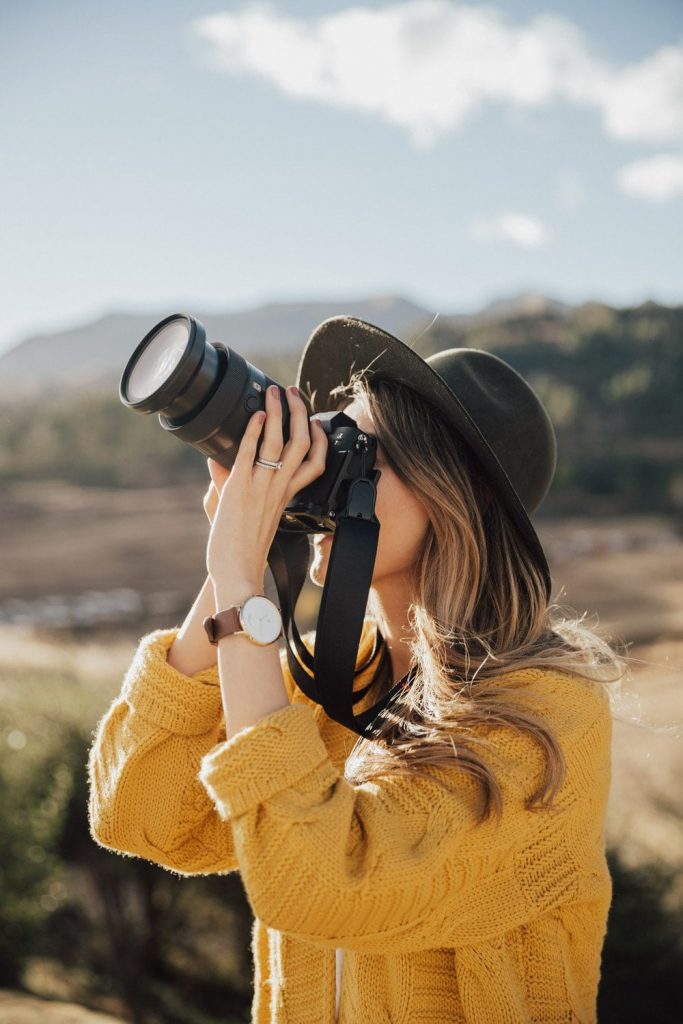
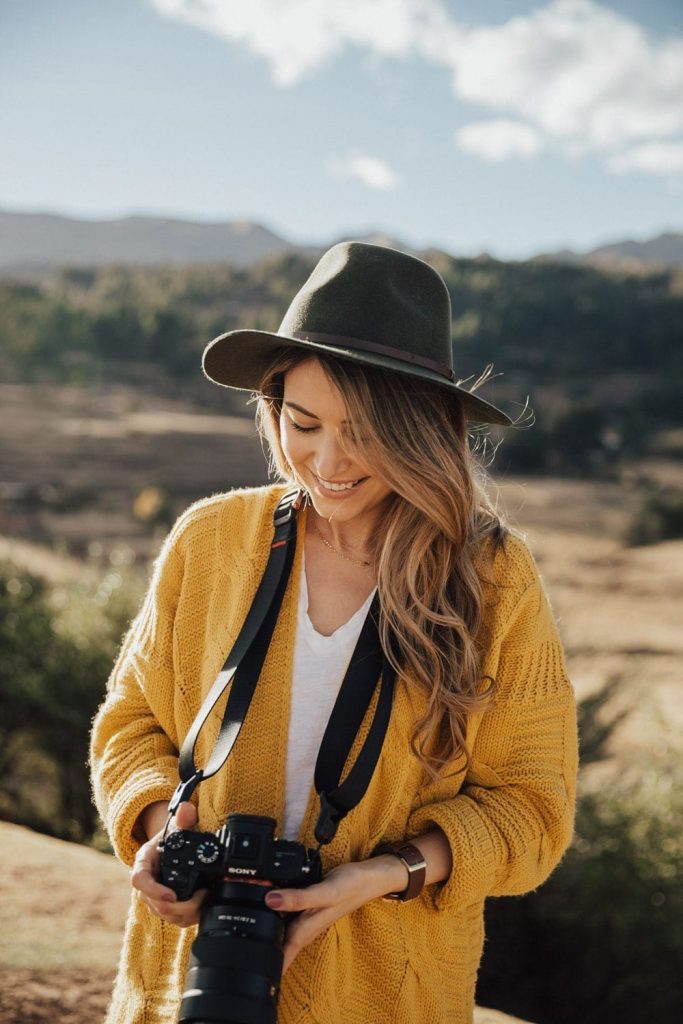
Invest In the Right Gear
There’s a big misconception in travel photography that in order to take beautiful travel photos, you need expensive gear. The truth is, you don’t need to own the latest and greatest. The best camera there is, is the one that’s in your hand – even if it’s just your phone!
You might have seen my ‘What’s In My Camera Bag‘ blog post and are feeling intimidated by the amount of gear I own. Don’t worry, photography is what I do for a living, and you don’t need this level of equipment unless it’s your profession. Some professionals don’t even have super expensive gear!
top recommendations for photography gear
Choose which approach best suits your needs and interests: phone, camera, or drone photography. Or it could be a combination of two or three. I personally use all three approaches to my photography work.
Creating travel photos with a Phone:
- High-quality phone camera such as the Apple iPhone 12 Pro / 12 Pro Max, Huawei P30 Pro, Google Pixel 4XL, Samsung Galaxy S21 Ultra 5G, Samsung Galaxy Note 10+, OnePlus 9 Pro
- Mini tripod such as a Joby Gorillapod (including the phone attachment). The Peak Design Travel Tripod also has a phone attachment and I find it super useful for phone photography and videos.
- Optional: Screw-on lenses such as the Xenvo Pro Lens Kit, Moment Anamorphic Lens. Or Apexel 36x Telephoto Lens
- Optional: Waterproof case cover such as those from Lifeproof
- Optional: AxisGo Underwater Phone Housing and Dome Port (for half over/half under style images)
Creating travel photos With a camera:
- DSLR or Mirrorless camera body, and/or an action camera like a GoPro
- Kit lens, or if you’re looking to upgrade a wider range, such as a wide-angle (16-35mm), middle range (24-70mm), and zoom (70-200mm, and 100-400mm)
- A sturdy and compact tripod that can hold the weight of your gear, and is compact enough to travel with
- Optional: Waterproof Housing (e.g. Aquatech) or waterproof camera (e.g. GoPro Hero 9)
Creating travel photos With a Drone:
- Drones like the DJI Mavic 2 Pro, or Mavic Air 2 are an excellent investment and provide a brand new perspective of many different locations
- Be sure to grab some extra batteries if you grab a drone for indeed flight time, and extra propellers in case you have any crash landings.

Take Photos At the Best Time
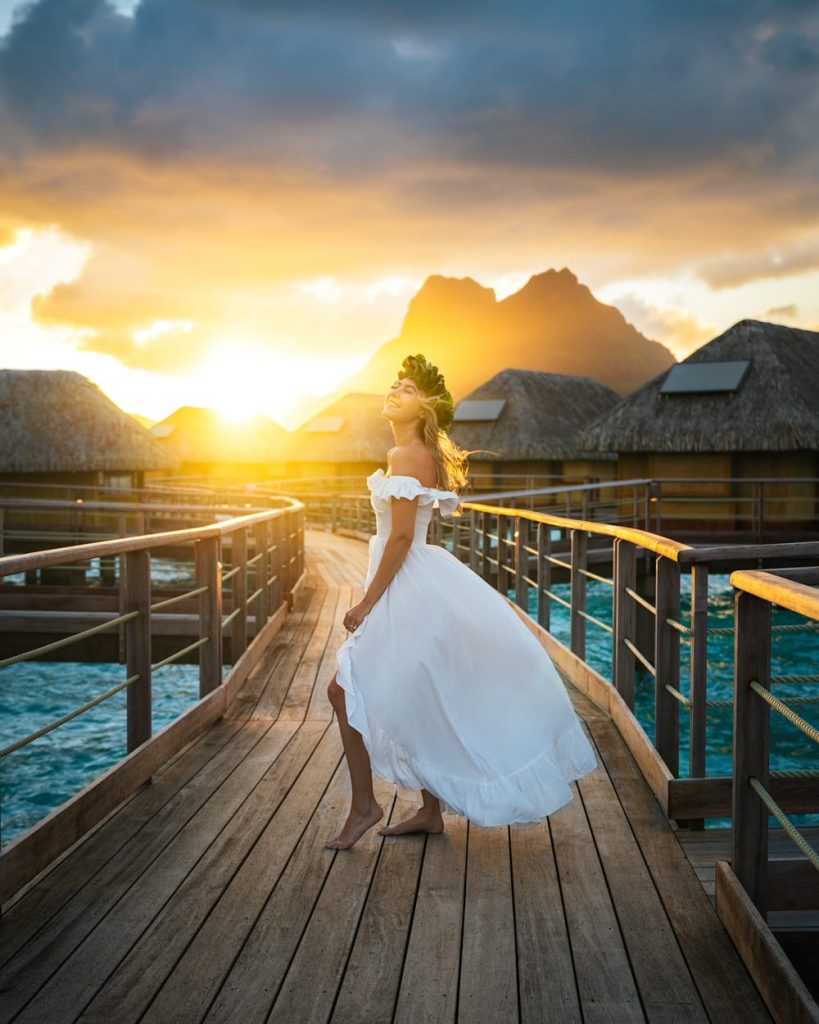
Here’s another important travel photography tip! When possible, you should always aim to shoot during golden hour, blue hour, sunrise, sunset. Typically, this is when you will experience the softest and most flattering light, colorful clouds, and the least amount of crowds! I love how quiet photo locations are during these hours, especially at sunrise. Don’t forget to pause for a moment and take it all in!
What is Gloden Hour?
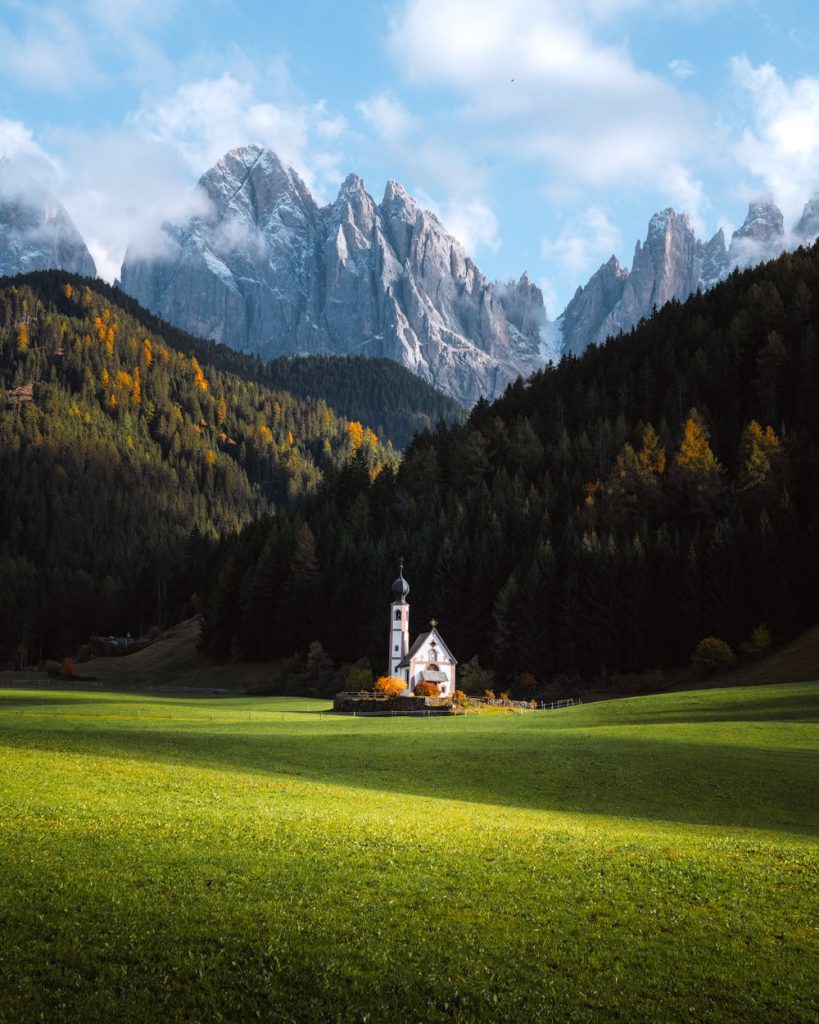
You may have already heard of the term golden hour, which is generally considered the best time to take photos! Golden hour is approximately half an hour before and 15-45 minutes after sunrise and sunset. Golden hour is so named because early morning light is soft, and of course, golden! Keep in mind that these windows will vary significantly depending on the time of the year. I recommend downloading the app “Golden Hour” to find the optimal time. The photo above is an example of golden hour photography.
What is Blue Hour?
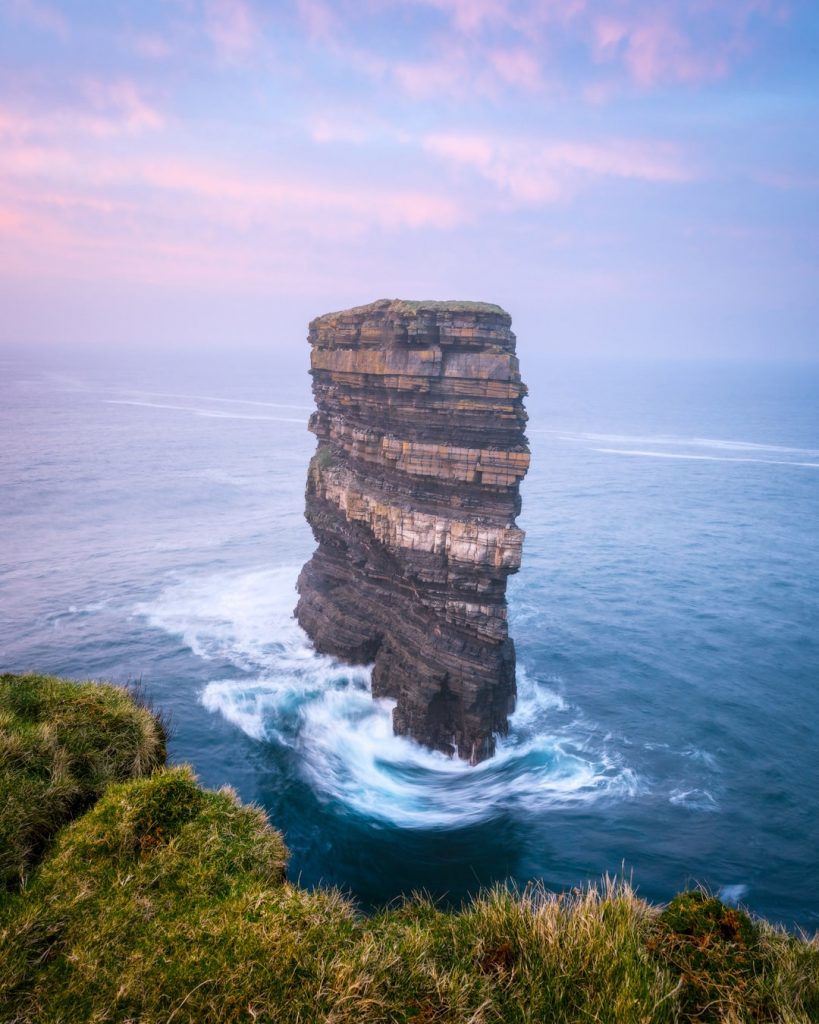
There is also so much beauty in the hour that follows the golden hour and it’s known as blue hour. Blue hour is the twilight period in the late dusk each evening, or the very dawn of the morning where sunlight takes on a predominantly blue hue and makes for unique lighting conditions.
Tips for Shooting in Harsh Light?
As beautiful as golden hour and blue hour are, it’s not always possible logistically to shoot a location during those times. You’ll often find yourself exploring destinations in the middle of the day where you’re much more likely to experience harsh light. Here are some tips to help you still make the most out of these midday conditions!
- Always shoot in RAW and in manual mode to have more control over your settings. A RAW image stores more information about a photo and allows you to have more freedom when editing later on.
- Try shooting with the sun off to the side or behind the subject. If it’s a cloudy day, wait for clouds to pass to diffuse the light.
- Play around and get creative with shadows. Shooting your subject in the shade is also a great option, especially if the scene’s lighting is consistent.
Set Up a Good Composition
Composition is one of the most important elements of photography, and one that can mean the difference between capturing an image that is captivating compared to a lifeless image. Capturing the beauty of the world around us in a single frame can be a challenge, but understanding composition is a great tool that will help you reflect a mood in your photos. Looking for all these elements and mastering techniques will get easier in time (the more you get out there and practice!) Below are some key things to consider.
Leading Lines
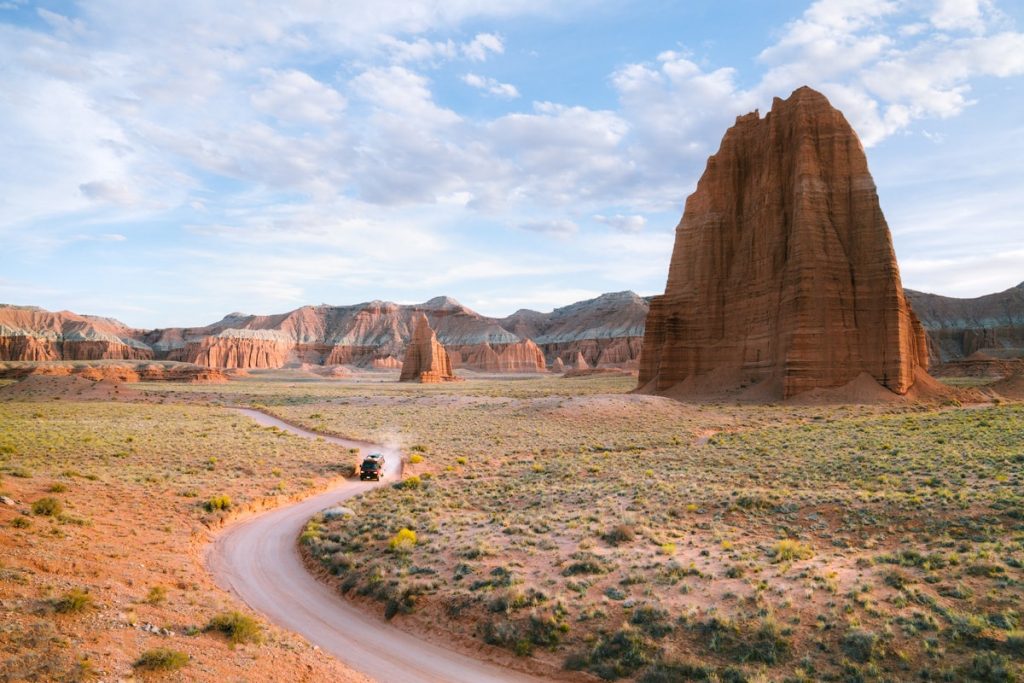
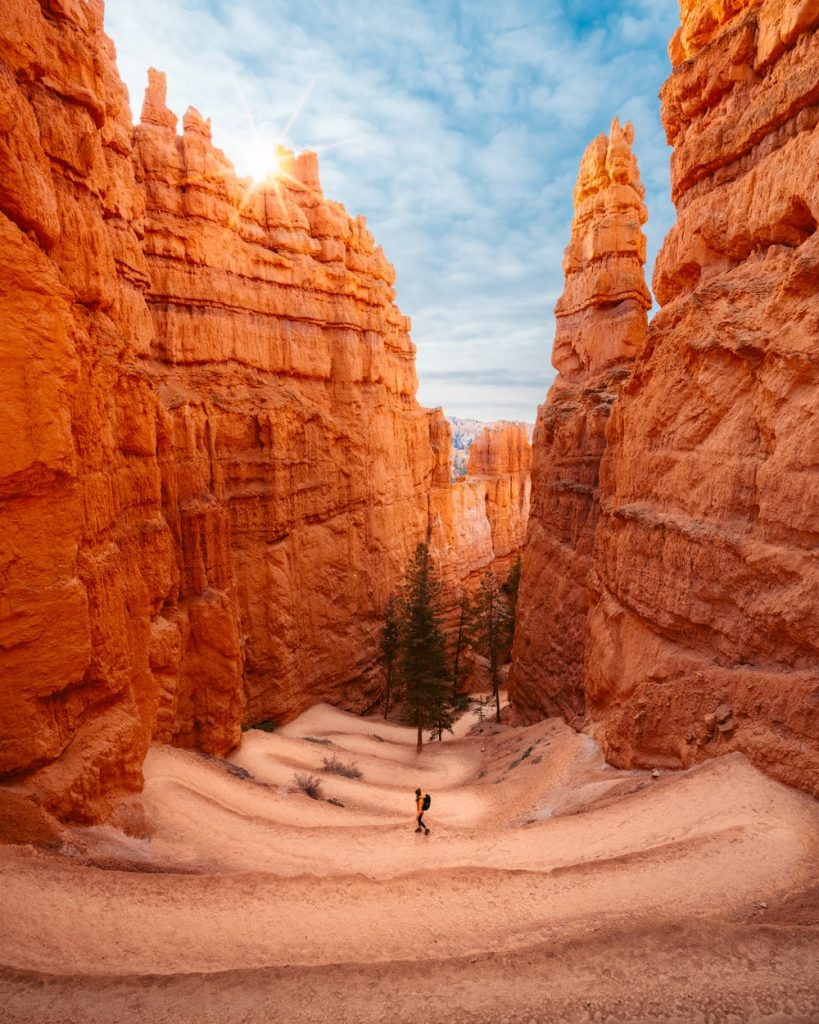
Think about how you could work with your surroundings to guide the viewer’s eyes to the main subject. For example, the S-curve in the road trip image two back, or the winding trail in the image above. Both of these lines help draw your eye to the subject. Leading lines can be found in buildings, shadows, rivers, trails, roads, and more. Open your eyes to what’s around you! Look at roads, crouch down low, or use branches nearby as inspiration!
The Rule of Thirds
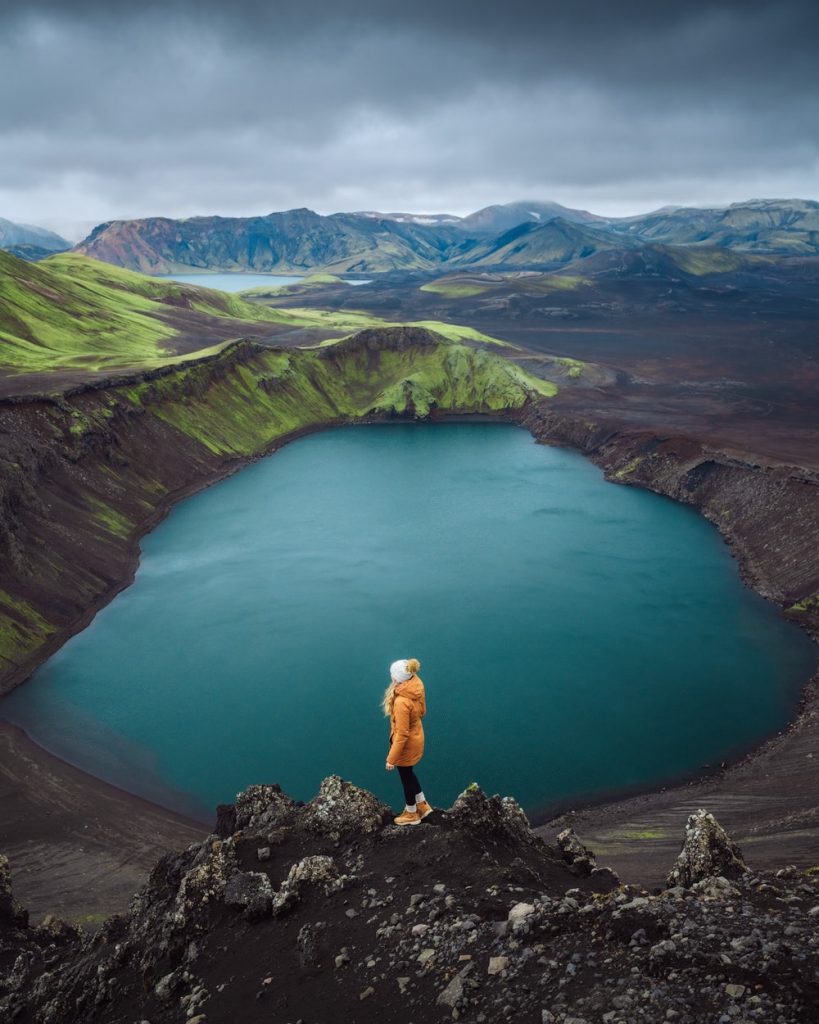
The basic principle behind the rule of thirds is to imagine breaking an image down into thirds (both horizontally and vertically) so that you have nine parts. These lines intersect where your viewer’s eyes will naturally be drawn to, so it’s a good idea to place your subject within them.
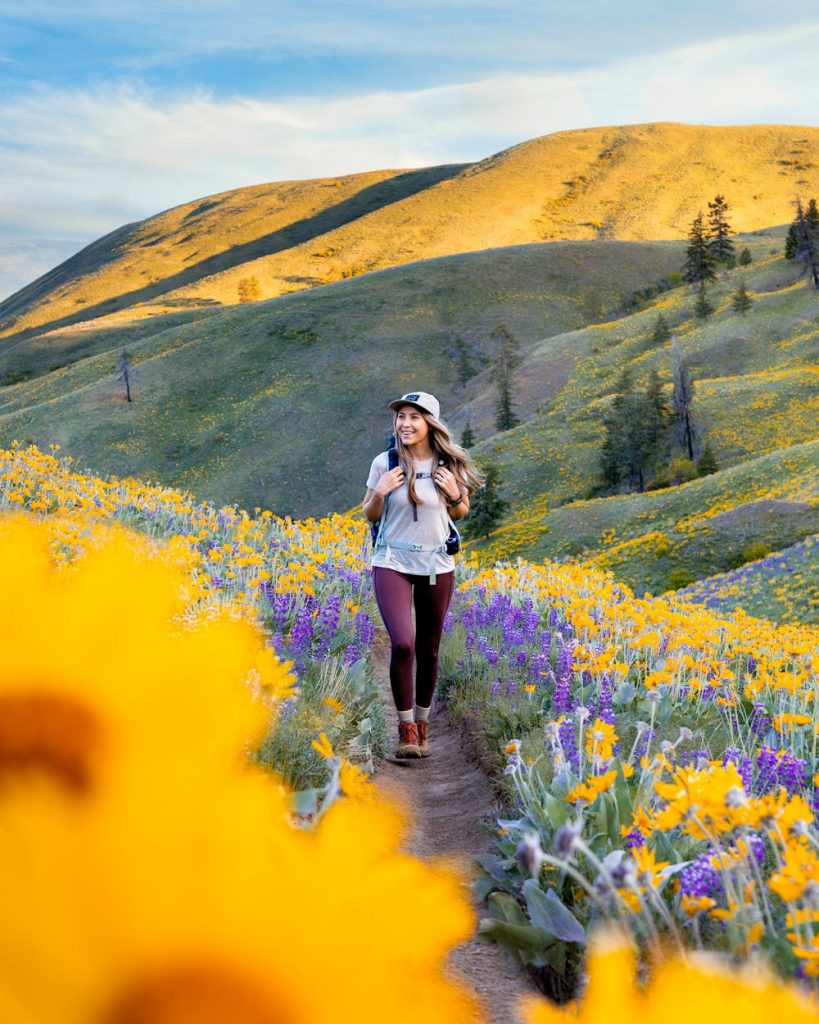
Depth of Field
Depth of field is the distance between the closest and farthest objects in a photo that appears acceptably sharp. Play around with your aperture and how close subjects are to the lens. Create softer foregrounds and backgrounds for a dreamy feel and to help draw the viewer’s attention to the desired subject. For example, the flowers in the foreground of the photo above help draw your eye to the subject and create more interest to the image.

Distractions
Always be on the lookout for ways you could simplify your image by removing distractions. E.g. in this palm tree photo (above), we quickly cleaned up some branches and twigs before snapping this image. You can also use Lightroom or Photoshop to edit out distractions in post-production. For this photo, I edited out a few dark splotches of sand but didn’t get rid of everything so it still looked natural and believable. This helps to keep the image about us and the scenery, not any messy debris.
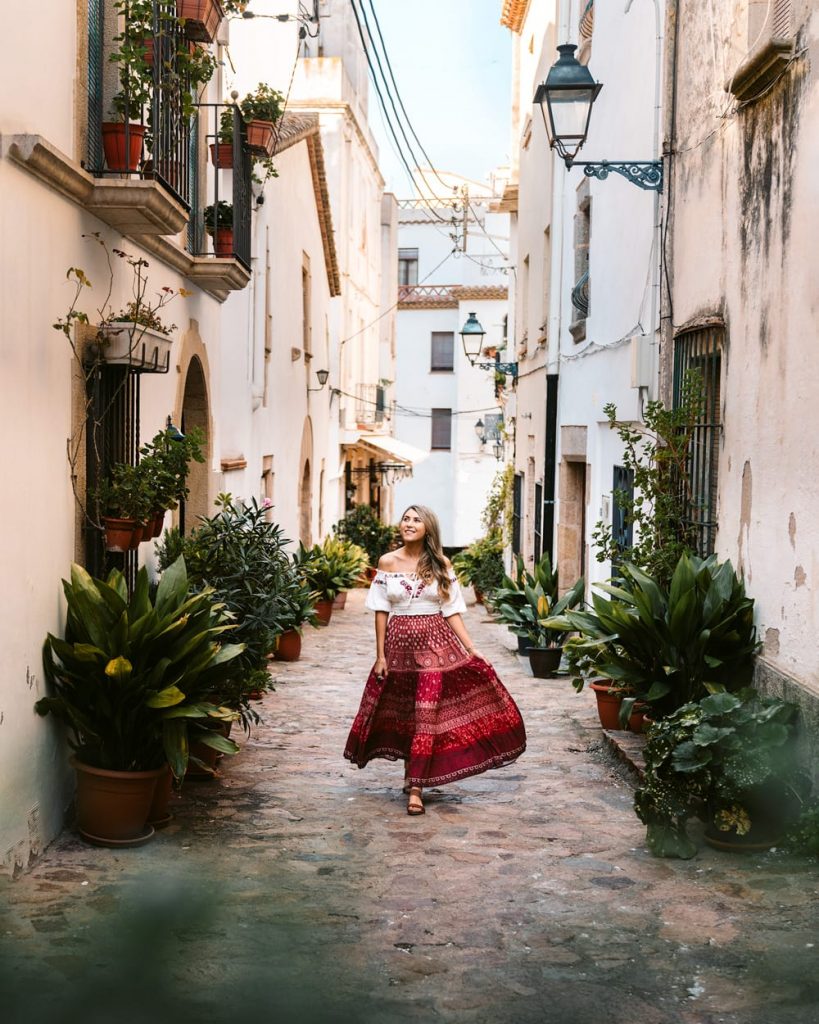
Use of Color
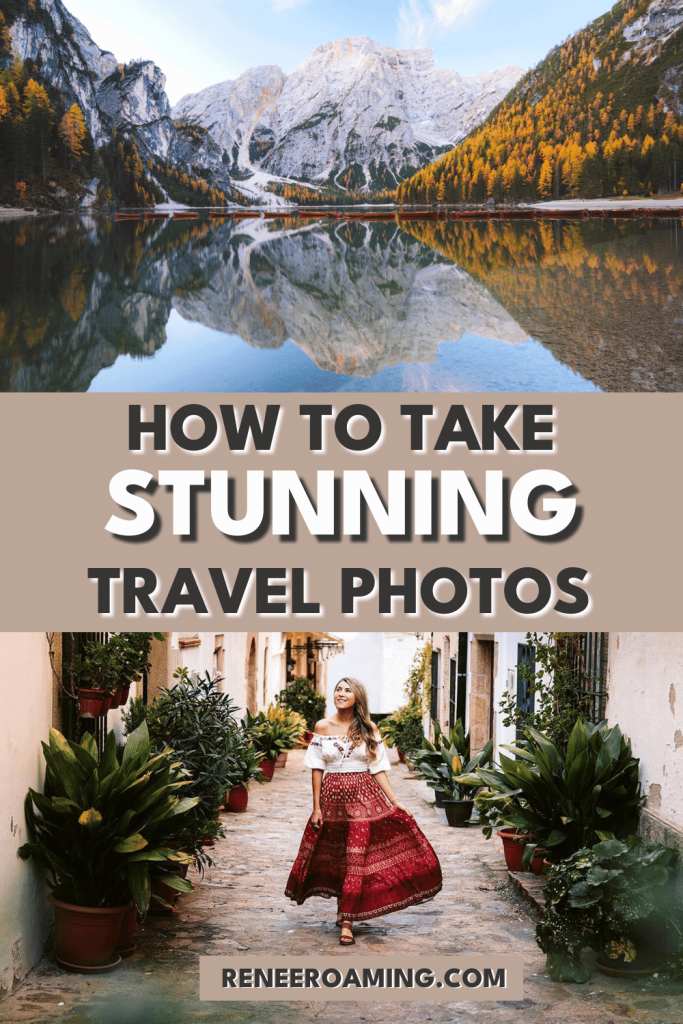
Understanding how colors work together and contrast each other will help you take your photography to the next level. I often consider how the colors of my outfit will complement certain scenes, or allow for me to stand out in a busy background. E.g. in the photo above, the red skirt helps draw your eyes to the subject in this Spanish alleyway full of distractions.
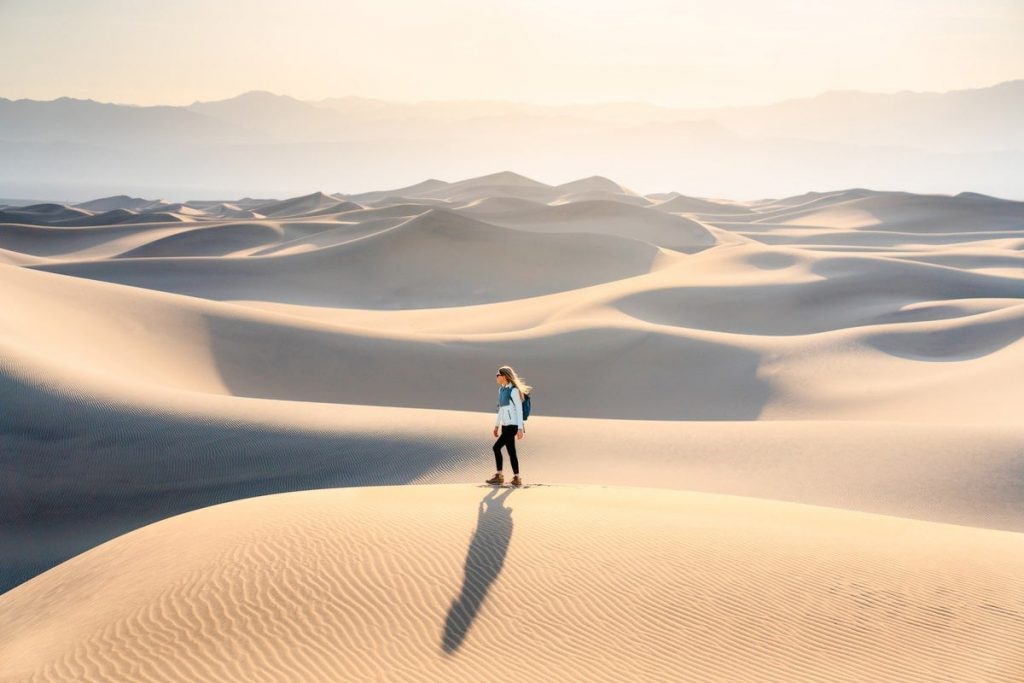
Add a Human Element
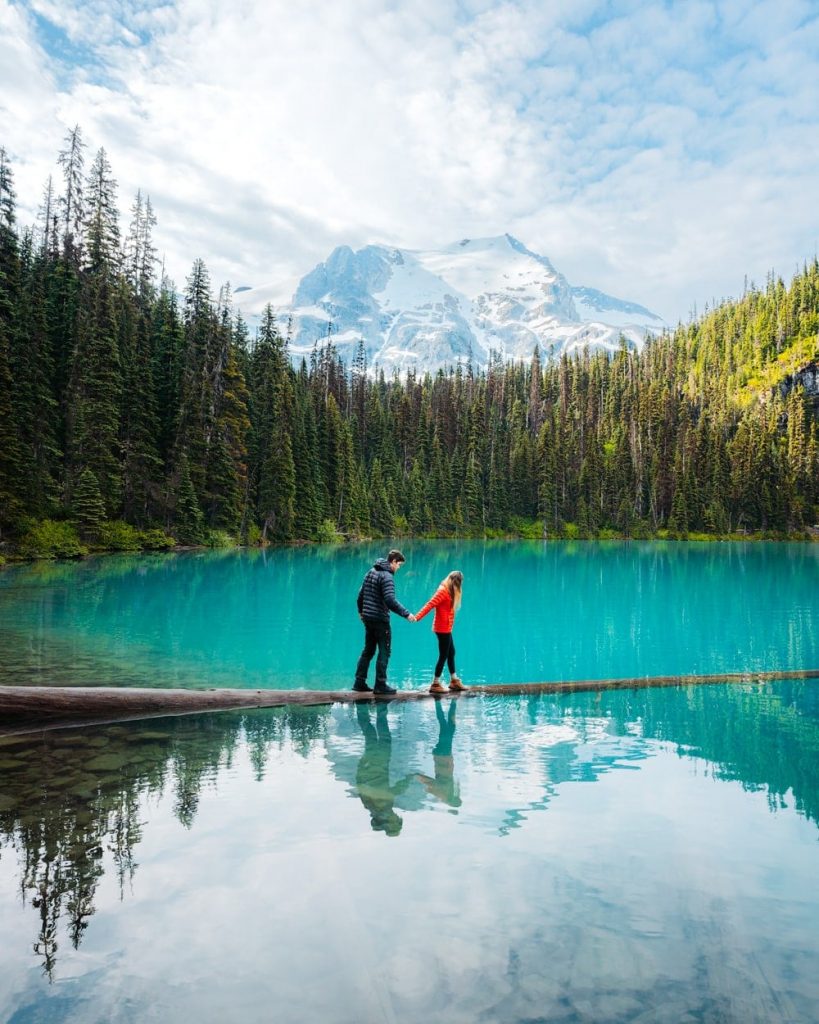
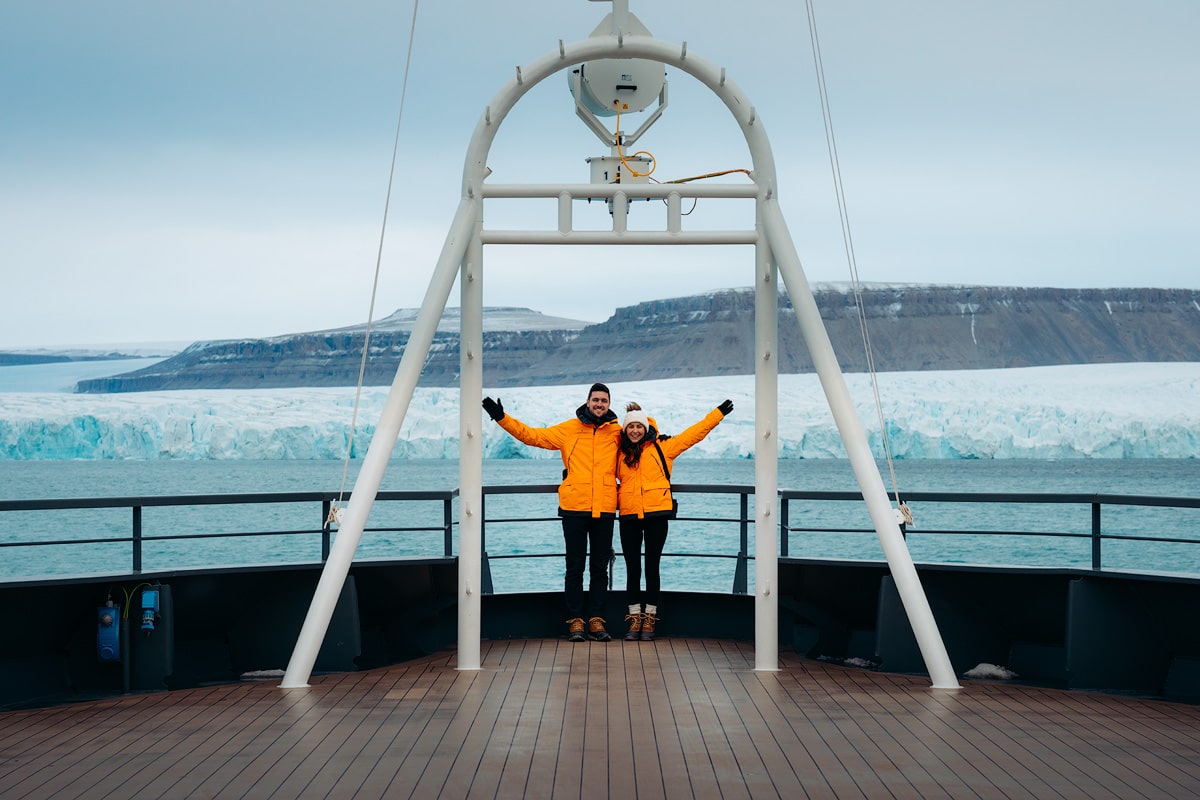
In order to take better travel photos, you should consider adding a human element to an image to show scale and share a story about the adventure. It can entice the viewer to imagine standing in that person’s shoes, experiencing the same magical moment. Additionally, including human figures in landscape photography provides the added benefit of both a focal point and a guide to scale.
Here are some of the best ways to incorporate more human elements in your photos:
- Capture the person/people in a natural action, e.g. walking through a river, along a path, etc. This will look less staged and show a more realistic depiction of what was happening. This is also a great technique when your subject may be a little camera shy or nervous about posing for photos.
- Landscapes often look more dramatic when a person is added for scale. Consider keeping the person small to really show just how larger than life the scene was.
- Make sure you position the person against a backdrop in which they will stand out, and consider what they are wearing. Bright and colorful clothing often works best, but each situation is different.
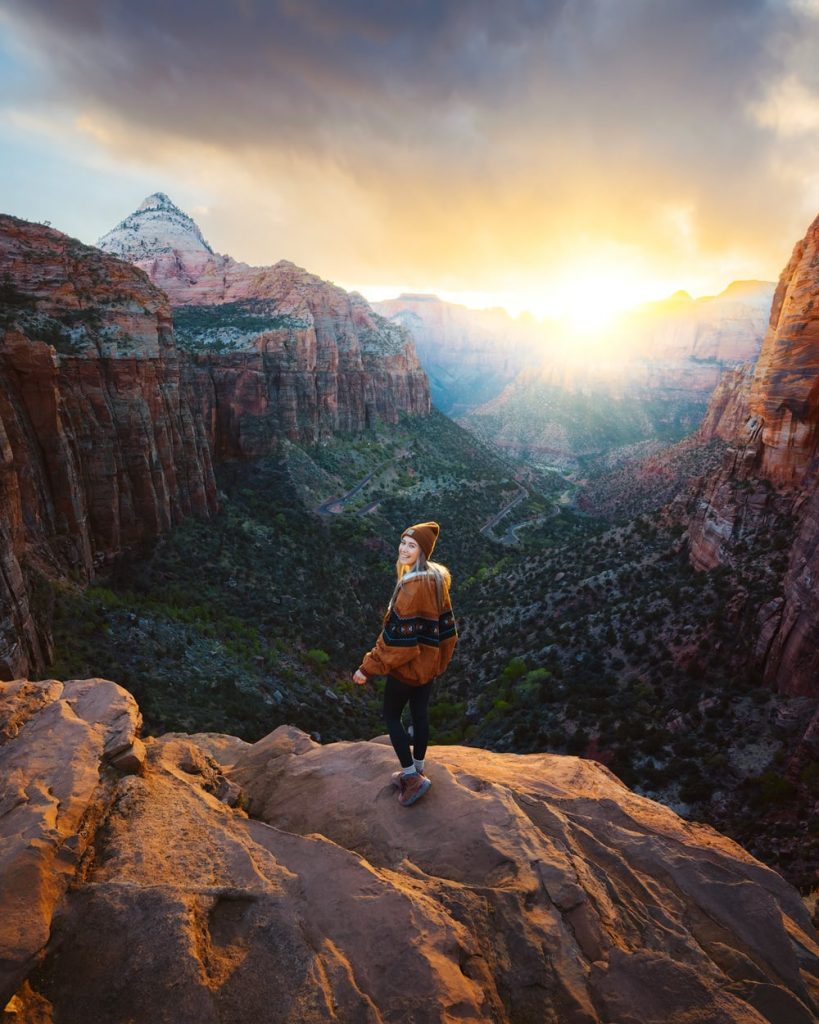
Storytelling With Your Travel Photos
Consider that you have the ability to capture and freeze a unique moment in time, all because you chose to pick up your camera or phone. An amazing travel photo should evoke feelings in the viewer, whether that be of awe, happiness, sadness, or simply wanderlust. Afterall, a picture is worth a thousand words – or so the saying goes.
One of the many things I love about photography is that it has the ability to convey stories to those that view them. Our brains are hard-wired to respond to stories—the more compelling, the better, and creating a story through a static image takes some practice! To find an interesting story to capture, all you need is to be there in the moment and let events unfold around you to catch great impromptu scenes when they show up.
Single shot or a series?
Not all single images tell a story. To capture a story, consider taking multiple pictures of different elements to convey how a place felt in real life. Try mixing it up with various shots, including small details, people, scenery, and some that show textures. Think of each picture as a piece of the puzzle that makes up an emotion or feeling.
writing Captions
Captions are an integral part of a photo story that should help the viewer understand each image. Still, it is crucial to keep in mind that while captions may expand your understanding of an image, it’s the image itself that should tell the story – never the other way round.
Storytelling Elements
- Consider body language and facial expression to convey a certain feeling and help narrate the story.
- Get to the level of your subject. In particular, photographing children and wildlife from their level often portrays more emotion and feeling than taking the same image from above.
- Contemplate sharing a story set (multiple images from the same place or experience).
- Adding a caption to your image will also help convey the story and provide context for your reviews.
- Consider focusing on what you as the photographer are feeling in that moment, e.g. are you elated? Maybe focus on bright/colorful scenes. Sad? consider capturing the moodiness of a landscape
How To Take Amazing Travel Selfies
“Selfies” often get a bad rap, mostly due to tourists using selfies sticks and people rudely taking over a spot so others can’t capture their own images. There are better ways to take epic selfies…
- Use a tripod for your camera or phone. Some popular brands are Manfrotto (DSLR, mirrorless) and Joby (phone, compact camera). GoPro sticks & tripods are also very effective if you use one of their action cameras.
- Use some sort of self-timer, in-built intervalometer, or remote control shutter release. Most cameras and phones have a countdown self-timer and many cameras can now connect to smartphone apps for the purpose of using them like a remote.
- Set up your desired image and then simply run into the shot or use your remote to capture the moment!
- Can’t get your hands on a tripod? Don’t be embarrassed to politely ask someone else to take your photo (show them how to use your camera first and be careful of thieves).
Read next: How to Take Stunning Travel Photos as a Couple
Improve Your Photo Editing
Another important element to take better travel photos is after you shoot, and begin to edit. Applying some basic editing to your images will make a world of difference. There are many different ways and programs used in pho editing, but I am listing the basics and my go-to’s below.
PRE-EDITING CONSIDERATIONS
If you are planning to capture images on your camera, be sure to have your settings on RAW rather than JPG. This will allow you to edit your images with much more range and precision.
SUGGESTED photo editing SOFTWARE
Phone Images
- Adobe Lightroom
- Snapseed
- VSCO
Camera Images
- Adobe Lightroom
- Adobe Photoshop
- Capture One
WHICH AREAS TO FOCUS ON:
- Exposure
- Contrast
- White balance
- Saturation/Vibrance
- Color hues
- Applying a vignette/ graduated filters
- Clone stamping out any major distractions
- Cropping the image
Travel Photography Practice ideas
Photography is an ongoing learning experience. Even the most professional shooters are constantly learning new ways to capture scenes, travel photos, and their preferred editing techniques. Don’t lose heart if it doesn’t all come together straight away!
TRY THESE BEFORE YOUR NEXT TRIP:
- Practice shooting at a local attraction/tourist spot. Try different compositions and push yourself to take a few selfies.
- Challenge yourself to explore a local destination with the intent of telling a story. Put together 10 images that demonstrate what you were feeling in that moment. Share the story set with your friends and family and ask for feedback.
- Be sure to enjoy the process because travel should be lived IN the moment not just when you review the images…
Final Thoughts on Taking Better Travel Photos
While reading some travel photography tips is definitely a great place to start, you’ll gain so much knowledge from testing things out and getting outside of your comfort zone! It won’t happen overnight, but over time your skills will improve — I promise! If you learned anything new about how to take better travel photos while reading this blog, I would love to hear from you and more about your own travel photography journey in the comments below.
PIN for Later
TamilDhool is the best place to watch latest Tamil serials online,
including Sun TV, Vijay TV, and Zee Tamil serials.Enjoy daily updated Tamil episodes,
full HD quality, and free access to your favorite Tamil TV shows and drama serials anytime.
Anicrush lets you watch anime online for free with SUB and DUB. Get daily updates on new episodes, high-quality streaming, and an ad-free experience.
I appreciate how Nekopoi maintains both quality and consistency. The videos play without buffering, subtitles are clear, and the app feels optimized for every type of device. Perfect for anime fans.
J’aime beaucoup le pull Stussy Clothing pour sa qualité et son design simple mais tendance. Un indispensable urbain.
amazing post dear
I tried the travel photography tips from this article last sunday and they were fantastic the advice is clear practical and truly elevated my photos! From timing shots during golden hour to focusing on composition and stroytelling, the guideance made a real difference in my travel pictures.
you said well but i love the food olive garden menu
TamilDhool is a popular online platform known for hosting Tamil TV serials, reality shows,and programs from major
Tamil television channels.It’s especially used by viewers who wantto watch episodes online after they air on TV,
including daily soaps, weekend shows, and special events.
This travel photo guide is super useful, and I can’t wait to try these tips
Suggestions after finishing a movie feel relevant helping me decide what to watch next without endless browsing when energy is low late at night during calm evenings at home alone relaxed comfortably
Thank you for sharing this wonderful and valuable information.
Recommendations feel relevant suggesting similar movies immediately after credits roll making marathon viewing simple instead of endless scrolling when energy is low during late evenings at home alone with snacks nearby relaxing quietly happily always.
Well written and straight to the point. This kind of practical advice really helps us.
Kissasian is a popular online streaming website known for offering a wide selection
of Asian dramas and shows, especially Korean (K-dramas), Chinese (C-dramas), Japanese
(J-dramas), and Thai dramas, along with some movies and variety shows.
Watch Free Anime Online with SUB and DUB – Daily update on new Episodes – Anicrush is provide a Free Anime Streaming in High Quailty Video and No Ads.
Applebee’s Menu 2026 is one of the best choices for tasty, affordable, and family-friendly meals.
Really liked the tip about lighting and angles. It’s kind of the same vibe when I’m grabbing anime wallpapers or scenes for edits on 9animetv.ba—timing and framing matter a lot.
Beirut escorts Beirut escorts escorts Beirut Beirut escort escort Beirut escort in Beirut Beirut escorts escorts in Beirut escort services Beirut
Kepala Bergetar lets you watch the latest Malaysian dramas and TV shows online
with quick episode updates, HD streaming, and simple navigation for viewers.
This is a very well-crafted article. It is clear that you have a deep understanding of the subject matter, and I appreciate that you took the time to share these insights with your audience. I will definitely be checking back for more updates!
The search tool actually finds what I want, including older series and rare films. It saves time compared with endless scrolling on paid apps that bury everything under algorithms I don’t like most of times.
Drift Boss Apk is an arcade-style drifting game typically played in a web browser. The player controls a small car that automatically moves forward along a narrow, winding track suspended in the air.
That’s great amazing
This travel photography guide has practical tips for capturing better shots by paying attention to light, composition and storytelling and it reminds me how in roblox taking time to frame and explore creative moments also makes the experience more enjoyable and expressive.
Funny Exchange is a modern digital platform designed for users who want a smooth, fast, and engaging online experience. The platform focuses on simplicity, clean design, and user-friendly navigation, making it suitable for both new and experienced users. Funny Exchange uses updated technology to ensure stable performance, quick response time, and mobile compatibility across all devices. One of the key highlights of Funny Exchange is its balance between fun-oriented interface and professional digital structure, which helps build user trust. With a focus on security, transparency, and ease of use, Funny Exchange is gaining popularity as a reliable and smart online exchange-style platform for modern digital users.
Paradise Estimating is a trusted leader in construction estimating, backed by over 15 years of industry experience. We provide professional, highly accurate material take-offs and comprehensive residential and commercial estimates designed to help contractors, builders, and property owners plan with confidence.
With more than 2,000 successful projects completed, our team is known for precision, reliability, and fast turnaround times. At Paradise Estimating, we’re committed to delivering estimates that support smarter budgeting, smoother workflows, and successful project outcomes.
Many people appreciate MoviesJoy for fast loading pages and simple browsing across devices. Still, broken links, misleading thumbnails, buffering issues, and frequent pop ups occasionally reduce trust among regular online movie viewers.
Simple and useful content is always appreciated, especially when it helps people quickly save and enjoy videos offline using tools like ytmp4hub.app.
Kissanime helped expand anime’s global reach by lowering access barriers for viewers worldwide. However, unreliable playback, pop ups, and missing episodes revealed drawbacks of free, unofficial streaming options.
Kissanime gained long term popularity due to its extensive catalog of classic and modern anime titles. Despite accessibility, buffering issues, pop ups, and enforcement actions exposed weaknesses of unlicensed streaming services.
I appreciate how Nekopoi maintains both quality and consistency. The videos play without buffering, subtitles are clear, and the app feels optimized for every type of device. Perfect for anime fans.
These travel photo tips are amazing! After a full day of exploring, a refreshing drink is the perfect way to relax. 7 Brew Menus offers standout flavors that make it easy to recharge after your adventure.
thanks for sharing22!
1. Clean and simple:
Magis TV receives frequent updates that enhance its performance and expand its channel lineup, making it an excellent option for Android users who want reliable, high-quality entertainment.
2. More engaging:
With regular updates that boost speed and introduce fresh channels, Magis TV keeps getting better. It’s a solid pick for anyone who loves crisp, high-quality entertainment on their Android device.
3. Professional tone:
The Magis TV app is consistently maintained with performance upgrades and additional channels, offering Android users a dependable and high-quality streaming experience.
Anupamaa Today full episode free download online, Anupamaa latest episode watch dailymotion.
Watch Desi Serial Latest Full Episode Online in HD Video
NetherSX2 stands out for its compatibility across various PS2 titles. Users highlight how small tweaks dramatically improve performance. Its user-friendly layout helps beginners adjust graphics, speed, and audio settings easily, resulting in a comfortable mobile emulation experience.
The Magis TV app is updated regularly, improving performance and adding new channels. It’s a great choice for anyone who enjoys high-quality entertainment on their Android device.
APAAR ID is a good concept, but proper implementation and awareness are important to ensure all students benefit from it.
These travel photography tips are so helpful! Capturing the perfect shot is all about timing, perspective, and creativity just like optimizing your setup for the best performance while editing or sharing those memories online.
Travel photos are such a great way to capture memories and experiences, and learning a few expert tips can make a big difference. I love saving travel photography tutorials and vlogs to watch later for inspiration. Using snaptubee helps me download and keep my favorite travel content offline so I can revisit it anytime.
Life isn’t about waiting for the storm to pass; it’s about learning to dance in the rain and finding joy even in the hardest moments
I truly appreciate the valuable insights and look forward to more of your excellent posts. At EduGrad, we guide learners in taking the next step in their careers by connecting them with the best UGC-approved and affordable Online MBA programs from top universities.
Thanks for sharing such clear and helpful photo tips! I especially liked how you explained choosing the best time of day and playing with composition. These ideas will definitely help me take better travel photo.
Best Mushroom Extraction Companies in India.
Anichin merupakan situs fansub Donghua subtitle Indonesia menyediakan berbagai streaming nonton anime dan donghua dengan kualitas terbaik dan terupdate.
Hosted by Dr. Mohamed Karim, this leading wellness podcast features specialists discussing health issues like IV therapy, Botox, and chronic conditions.
Informative post! Always love reading detailed takes like this. At Sportsdunia, we share similar passion for sports — bringing fans the latest updates, live scores, and in-depth analysis from around the world.
Thanks for the information. I like the way you lucidly express complex topics. It helps me understand it in a much better way. We’re offering high-quality & original 6PM Hoodies from 6PM Hoodie Store. We offer Like Hoodies, tracksuits, Sweatshirts T-shirts, Shorts, and fast & secure shipping worldwide at 6pmjogginganzug.shop Offical Online Store.
you said will . alright
Need auto glass repair? CarLove Glass in SC offers premium windshield, and door glass services with zero hidden charges.
Budget-savvy students love Castle App’s no-fee docs and study-break shows, with quick-resume for short sessions. Low-data mode fits dorm Wi-Fi. 2025’s focus timers pair with streams. Affordable unwind tool.
Transform your digital presence with Moken Digital’s web design uk expertise. We craft responsive, SEO-friendly sites that captivate and convert.
lol😂. i wanna become photographer in my childhood
Discover bold flavors and fast service with 7 Brew Coffee your go-to spot for energizing brews, refreshing smoothies, and custom drinks made just the way you like.
Cloud Gateway services simplify secure and efficient communication between cloud applications and on-premise systems. They enhance data transfer, reduce latency, and ensure seamless integration across platforms. By leveraging Cloud Gateway, businesses can improve scalability, reliability, and overall IT performance. It’s an essential solution for modern enterprises looking to optimize connectivity and streamline operations effectively
It is very helpful for us. Thankyou
Well Said & Great Achievement
It is very helpful for us. Thankyou
Join thousands of players on the Tiranga Game app. Predict colors, play mini casino games, and win daily bonuses. Fast, secure, and fun for all online gaming lovers.
Watch desi Serial online Free in high quality
y999 game logic puzzle that reinvents the classic Queens game. Features a unique third constraint of colored regions for a deeper strategic challenge.
OUTBACK STEAKHOUSE MENU USA (UPDATED 2025), founded in 1988 in Tampa, Florida, is now a popular restaurant in the U.S. It serves steak, chicken, ribs, seafood, burgers, and its famous Bloomin’ Onion, along with desserts, vegetarian options, a breakfast menu, and kids’ meals. Some favorites are Alice Springs Chicken, Baby Back Ribs, Grilled Chicken on the Barbie, and Caramel Mustard Glazed Pork Chops.
Betbhai9 is a trusted online betting platform offering access to top sports betting exchanges and casino games. Known for its fast ID creation, secure transactions, and 24/7 customer support, Betbhai9 ID caters to Indian users looking for an exciting, reliable, and convenient betting experience. With a growing user base and seamless mobile access, it’s a top choice for cricket and casino gaming enthusiasts.
Green Flame Fuel: wood pellets is a comprehensive information resource promoting the UK as a global supplier of quality, environmentally-responsible forest products from sustainably-managed forests.
Fresh poppy pods are the seed pods that are harvested from the poppy flower. Poppies are known for their beautiful flowers, but it’s their seed pods that are of the most value. These pods contain the seeds for the next crop and, when dried, they are frequently used in floral arrangements and other decorative crafts. By using fresh poppy pods, you can take your art to the next level as it gives a natural and pleasant look to your creations.
Thank you very much for the information. This website is very helpful for me as a beginner.
Free access to premium Kik sexting forums. Find anonymous usernames and join trending group chats
La aplicación Magis TV APK te permite crear una lista de tu contenido favorito para que puedas verlo fácilmente más tarde, en cualquier momento y en cualquier lugar.
That’s an incredibly inspiring story, Its amazing to see how you turned your passion into a successful, self made career. It really proves that with dedication and the right resources, you can achieve anything. This is great motivation for anyone looking to level up their skills, whether it iss in photography, gaming, or any other field
For fellow gamers looking to hone their skills and strategy, check out magicbrawl
The special menu items are such a refreshing change—thanks for pulling them together. I just browsed them here
Descargar Magis TV APK te permite acceder a cientos de canales en vivo, películas y series directamente en tu dispositivo Android. Es una aplicación ligera, rápida y fácil de usar, ideal para disfrutar de contenido en streaming sin cortes. Con una interfaz intuitiva, ofrece entretenimiento variado y gratuito, convirtiéndose en una gran alternativa para ver TV online.
“9Anime is lit! Best anime streaming site!”
“Love Anime Suge! Best anime streaming site ever!”
Yeh Rishta Kya Kehlata Hai is an official StarPlus drama. Watch the latest episodes in Hindi,
available online in HD quality for Disney+ Hotstar and JioCinema users,
New episodes are updated daily stream full episodes free.
The gear breakdown was awesome. I’ve been debating between getting a tripod or a drone, and now I think I’ll start with a sturdy tripod before upgrading later.
Love how you mentioned that the best camera is the one in your hand. I always thought I needed expensive gear, but this post makes me feel more confident about using just my phone.
“Great tips on how to take better travel photos! 📸 I love how you emphasized lighting and unique perspectives—it really makes memories more vivid. Definitely going to try some of these techniques on my next trip!”
Teen Patti Crown is one of the most exciting card games in Pakistan and India, giving players the perfect mix of entertainment, strategy, and rewards.
Geometry Dash Lite is the free-to-play version of the original Geometry Dash game. It offers a fast-paced rhythm-based platforming experience with a limited selection of levels, ideal for newcomers looking to try out the game before committing to the full version.
Royal X Casino delivers a world-class gaming adventure with endless excitement and luxury. Players can enjoy a vast range of slot machines, classic table games, and live dealer experiences in a stylish setting.
Gosh, I love your website! And your photography tips. I’m hoping to get into B&W photography and would love to take better travel photos. Your tips and equipment recommendations are excellent. So glad to find you on the interwebs!
Tried out the fishing game on vblinkz recently and it was way more fun than I expected. Super chill and a nice way to unwind for a few minutes.
Smooth streaming and easy navigation CinemaHD Official App truly delivers a seamless movie-watching experience!
Smooth streaming and easy navigation CinemaHD Official App truly delivers a seamless movie-watching experience!
Fast, user-friendly, and reliable—Snaptube’s official website makes media downloading effortless.
Fast, user-friendly, and reliable—Snaptube’s official website makes media downloading effortless.
Minecraft free download , like the game itself, receives updates on a fairly regular basis, though the exact frequency can vary.
Do you want to improve your trip photos? These pointers are a fantastic beginning. Use an AI-powered tool to easily eliminate distracting backgrounds from your photos for an added boost.
how many of me in the world
This guide is such a gem! 📸✨
I really appreciate how approachable and honest it is—especially the reminder that you don’t need fancy gear to start creating beautiful images. It’s so encouraging to hear from someone who’s self-taught and has turned their passion into a full-time journey. Your tips on composition, lighting, and even working with friends/partners make everything feel doable. Can’t wait to put these into practice on my next trip!
Great tips! Capturing the essence of a place really comes down to timing, lighting, and perspective. I’ve started applying some of these tricks on my own travels and noticed a big improvement. Thanks for the helpful guide!
Download the latest HiTv APK for free! Stream K-Dramas in Full HD without ads, and unlock all Premium VIP features on Android, iOS, and PC.
Great knowledge
These Expert Tips and Tricks on how to take better travel photos are the best. There are a lot of people searching for the right ideas that bring what we are required.
Thank you for this fantastic guide on taking better travel photos! Your expert tips and personal insights are incredibly valuable, and I’m excited to apply them to enhance my travel photography.
photos during travelling is a golden task, if someone take this responsibility and does not fulfill his duty then all travel expense, excitement becomes useless. When our friend decide to go on a travel then we decide who will become photographer, a gamer but before decided to gamer first we decide a competition for Stumble guys mod menu and decide a prize money. In Stumble guys with modified version no limitation sets at all.
very niche
HiTv HD Official is a fast-growing entertainment app that allows users to stream the latest movies, web series, and TV shows in high definition.
The app is easy to use and supports subtitles in multiple languages, making it accessible to a global audience. Although HiTv HD Official is often downloaded through third-party sources, its user-friendly interface and frequent content updates keep it popular among viewers who want on-demand access to trending series without any subscription fees.
Sflix is a popular streaming platform that offers an extensive library of movies, TV shows, and documentaries from around the world. With its user-friendly interface and high-quality streaming options, Sflix has quickly become a go-to destination for entertainment enthusiasts. Whether you’re looking for the latest blockbuster hit or a timeless classic, Sflix has something for everyone. Plus, with no subscription fees required, it’s an attractive alternative for those seeking free, unlimited access to content.
thanks for sharing this such an amazing article
Thanks alot!
Capturing a great travel photo is all about framing, detail, and timing—just like turning a creative idea into a perfect print by converting your 3D model into G-code with the right software.
Whether you’re commuting to work, heading to a mall, or exploring the city, the metro provides a smooth, affordable ride. It’s a major step forward in making Riyadh a more connected and sustainable city.
Amazing and such a helpful comment.
I love this so much Renee!
You’ve gone into so much amazing detail which is so so sooo helpful!
Thank for sharing this amazing photos and this blog i loved it
Thanks for If you have a passion for adventure and discovering new places, Shadow Fighr 2 lets you enjoy the thrill of exploring a fun and open world like never before.
If you love traveling and exploring the world, then Dude Theft Wars offers you an amazing world tour experience.
Fire Kirin for iOS brings the thrill of arcade fishing games directly to your iPhone or iPad. While it may not be available in the App Store, it’s still accessible through verified sources. Whether you’re a seasoned player or new to the scene, Fire Kirin on iOS offers an engaging experience packed with action, skill, and rewards.
Enjoy the world tour while at home using your mobile phone. Yes Dude Theft Wars provides you with the experience of a world tour
Thankyou for sharing this blogging verry good.
A well-organized platform offering insights into the latest trends and discoveries in oncology, fostering informed conversations on cancer care.
Whether you’re a student, content creator, or someone who just wants to enjoy videos offline, YTMP4 is a must-have tool in your digital toolbox.
Null’s Brawl brings the ultimate Brawl Stars experience—no grind, just pure fun from the start!
If you’re passionate about advanced photo editing without any restrictions,
Very Nice and easy to download!
this is the world top rated to do the best and well managements. good experience and .
TubeMate continues to download files in the background, allowing you to multitask or even turn off the screen while the download completes.
Really solid post. I found this while just browsing around and ended up reading more than I planned to — always a good sign. You’ve got some genuinely useful info here. Keep it coming, I’ll definitely be back for more.
PicassoTV is a third-party streaming application designed to give users access to live television, movies, web series, and more. The platform supports a vast collection of both regional and international content, catering to a global audience. Available primarily for Android devices, PicassoTV has gained popularity for its user-friendly interface and reliable performance.
thanks for putting interest into your blog.
thanks for sharing this amazing info with us
These tips are incredibly helpful, Renee! I love how you break down the importance of timing and composition in travel photos. As someone who loves documenting my travels but struggles with finding the right moment, your advice on the best time of day really hit home. And I totally agree — you don’t need expensive gear to capture great shots, just the right mindset! Looking forward to putting these tips into practice on my next adventure!
Sometimes making a decision can be tough and using tryflipacoin makes it much easier It is fast reliable and you can use it anytime you want a simple way to settle a choice
Castle is your personal fortress for digital security, combining password management, identity protection, and data privacy in one sleek app. With advanced encryption and seamless syncing, your information stays safe across all devices. Effortless to use, powerful by design—Castle keeps your digital world protected.
Absolutely! Memories are priceless, and photos make them last. Even if your pics come out blurry, no stress — you can enhance and improve them easily with the Wink App.
Letterbox NYT is a fun and challenging word puzzle that keeps your mind sharp and entertained.
Watch Jhanak serial In Hd Quality By Indian Channel Hotstar And Star Plus
Watch Anupama serial In Hd Quality By Indian Channel Hotstar And Star Plus
Watch Yeh Rishta Kya Kehlata Hai serial In Hd Quality By Indian Channel Hotstar And Star Plus
Thanks for the great blog post, I really liked it!
Excelent post, try FceApp for photo editing. FacePro is a powerful photo editing app that uses AI to transform your selfies. It offers features like aging filters, gender swaps, smile enhancements, and various beauty filters.
This post was truly inspiring! I’m Timer, and I’ve developed a tool that helps maximize productivity in just five minutes.
A 5-minute timer can really boost focus and productivity. I use this website whenever I need a quick push to get started.
Very Amazing and helpful blog. Thanks for sharing this outstanding blog.
Crumbl Spoilers give fans an early look at the upcoming week’s Crumbl Cookies menu before it’s officially revealed. With a fresh set of flavors released every week, these previews help cookie lovers plan ahead for their favorites.
I was trying to hack the Bowmasters for all the characters to have some extra spice in the game
KineMaster is a powerful video editing app that allows users to create professional-quality videos directly from their mobile devices. With its user-friendly interface and a wide range of features, including multiple layers for video and audio, precise trimming and slicing, and various effects and transitions, KineMaster enables users to edit their footage seamlessly.
Enjoy the world of movies and shows while at home using the mobile. Yes beetv.su provide you an experience of world tour at home on your big screen like Android, Samrt smartphones, iOS, iPadsand on Mac
Thanks for sharing!
i have also a craze for taking photos during traveling
Awaaz arhi hai behra nhi hu main
BeeTV is a way to stream a high-quality level of movies and TV shows, also anime. It has a large library content for the users to enjoy videos a lot. Its well-designed interface attracts a large number of viewers. You can download it from beetv.su because it is a safe and secure website and protects the users from stealers and bugs.
BeeTV is a way to stream a high-quality level of movies and TV shows, also anime. It has a large library content for the users to enjoy videos a lot. Its well-designed interface attracts a large number of viewers. You can download it from beetv.su because it is a safe and secure website and protects the users from stealers and bugs.
you hsould try inshot there are many travel related templates
this is true, travel photos can be one of the greatest memories, if you get photos that are blurry, do not worry you can improve the quality with wink app too
I love this so much Renee!
You’ve gone into so much amazing detail which is so so sooo helpful!
I find you article very informative.
yeah completety agree, if you want to play volleyball it is definitely a great game
wow that great article very nice information
nice information
I love this girl, what a beautiful looking beautiful
watch movie and tv show many movies like Netflix
photoshoot and photography very good i love this passion
With Remini, you can bring faded or damaged images back to life with incredible clarity and detail.
Want to capture stunning memories on your trips? Learn How To Take Better Travel Photos with the right angles, lighting, and composition! And for some fun after editing your shots, check out Null Brawl for an action-packed gaming experience!
Thanks for the tips
I find you article very informative.
Sonic is one of the best best restaurants in USA. every one of you must visit it once in your life
FilmApp brings you the latest film releases, trailers, reviews, and ratings all in one place. Watch content instantly, create your own watchlist, and find new movies to enjoy based on your interests.
Thanks for sharing an amazing blog post it’s very cool
If you’re searching for powerful photo editing apps, there are plenty of great PicsArt alternatives to explore. Whether you need advanced tools or simple editing features, these apps have something for everyone.
your artical is good
Helpful guide, but as a gamer I play android games while traveling too
Watch Anime Online, Free Anime Streaming Online on zorox.com.tr
Watch Anime Online, Free Anime Streaming Online on zorox.com.tr
If you’re traveling with a team and capturing. The photos makes the journey unforgettable but along with great pictures, a memorable team name also matters.
Watch Anime Online, Free Anime Streaming Online on Kissanime.to
Well guide thank you for such tips
Awesome tips! Paying attention to details really makes a difference in travel photography!
Thank you for providing such valuable information! I truly appreciate the effort you’ve put into sharing these insights. Your post is not only up-to-date but also highly informative. I’ll be bookmarking this page to revisit and explore more of your content in the future.
Keep up the excellent work!
MagisTV is considered one of the best IPTV services for streaming live TV and on-demand content, especially for Latin American channels.
Good Content excellent resource for anyone looking to learn more about this topic. It’s well-researched, well-written, and very informative!
Whether for entertainment, role-playing, or productivity, this AI chatbot ensures seamless interactions with improved accuracy and response times.
If you need to send WhatsApp message without saving the number, you can use the click to chat feature by entering the phone number with the country code in your browser. This instantly opens a chat without adding the contact. Some smartphones also allow you to send WhatsApp message directly from the call log. Additionally, third-party apps offer a quick and easy way to send WhatsApp message without saving the number, making communication effortless.
Thanks for sharing! I found a lot of interesting information here. This is a great post, and I’m very grateful. Looking forward to many more like this!
Awesome advice! The best travel photos tell a story, not just capture a scene. Thank You!
“Learning how to take better travel photos can turn your adventures into lifelong memories! From mastering angles to playing with natural light, every little tip makes a big difference. Pairing your photography skills with tools like film app películas can enhance your visuals, helping you edit and organize your shots seamlessly. Whether you’re capturing sunsets, cityscapes, or candid moments, this app ensures your travel photos are as stunning as the memories themselves!”
Awesome tips! Paying attention to details really makes a difference in travel photography!
Stream Anime Online for Free – Your Anime Destination on AniWatch
Download Anime Slayer to watch your favorite anime shows and movies. Enjoy a wide collection with easy access and updates!
Thanks for Sharing!
very nice info,this post good
Want to elevate your travel photography? These tips are a great start. For an extra boost, consider using an AI-powered tool to effortlessly remove distracting backgrounds from your images.
There are thousands of free templates available to you in CapCut. Styles, effects, and transitions abound in these premade layouts.
To take better travel photos, use Lightroom Pro for advanced editing. Capture well-lit, composed shots, then enhance them with Lightroom’s tools like exposure adjustment, color grading, and clarity. Use presets for consistent style, and experiment with selective editing to highlight key areas. Lightroom Pro elevates your travel photography to professional standards.
Well said, I really appreciate this a very useful information you delivered. Good Job
You’ve gone into so much amazing detail which is so so sooo helpful!
I’ll have to go over this again as its amazing and there definitely is a lot to learn and take out with me on my next trip with my camera
WhyThi is a comprehensive informational platform dedicated to delivering high-quality content on a variety of topics. From in-depth articles on net worth
To take better travel photos, focus on composition, use natural light creatively, capture unique perspectives, and be mindful of storytelling through your images.
Gosh, I love your website! And your photography tips
Renee’s journey from novice to professional travel photographer is inspiring—proving that with passion, practice, and the right guidance, anyone can master the art of travel photography!
I can recommend some apps like Alight Motion, Capcut and Kinemaster.
I love this so much Renee!
You’ve gone into so much amazing detail which is so so sooo helpful!
These travel photo tips are fantastic! After a day of exploring, there’s nothing better than unwinding with a refreshing drink. The 7 Brew Secret Menu offers unique and flavorful beverages that are perfect for recharging after your adventures.
Great tips for improving travel photography! In addition to these helpful suggestions, if you’re looking to enhance your photos further, you might want to try out an AI-based tool for background removal.
For those wondering about Pregnancy And Breast Cancer, consulting specialists early ensures a clearer understanding of risks and solutions.
Navigate effortlessly with Lotus365 India, where simplicity meets advanced technology. Discover secure features, intuitive tools, and exclusive options tailored for reliability and ease of use.
Great tips for improving travel photography! In addition to these helpful suggestions, if you’re looking to enhance your photos further, you might want to try out an AI-based tool for background removal. It’s especially useful for editing those travel shots.
Taking better travel photos often involves capturing the right moments, lighting, and angles, but editing can enhance those photos even further. Just like how **Kinemaster** empowers users to edit and refine videos with professional tools, using editing apps to adjust exposure, contrast, and cropping can elevate your travel photos, helping them truly stand out. With the right tips and a bit of editing, your photos can look as polished as the footage you create with Kinemaster!
These travel photo tips are fantastic! After a day of exploring, there’s nothing better than unwinding with a refreshing drink. The 7 Brew Secret Menu offers unique and flavorful beverages that are perfect for recharging after your adventures.
Great tips for improving travel photography! To take it a step further, apps like CapCut can help enhance your travel photos and videos with advanced editing tools, creative effects, and smooth transitions. It’s a perfect companion for making your travel memories truly unforgettable!
Thank you, Renee, for this incredibly insightful guide on travel photography! I appreciate how you’ve emphasized that the best camera is the one in your hand — it’s a refreshing reminder that creativity matters more than expensive gear.
the photos are so great and unique, loved them, can I ask which camera did you use
I love this so much Renee!
You’ve gone into so much amazing detail which is so so sooo helpful!
Pencit Menu, Filipinos love noodles like Pancit Trio, they often enjoyed at festivals and gatherings. Amber Golden Plate Restaurant has a special section on their menu just for noodle dishes.
These travel photography tips are fantastic! The advice on using natural light and framing shots to capture a sense of place is so helpful. I often struggle with making my travel photos look unique, but your tips on composition and experimenting with angles give me new ideas to try. For anyone wanting to up their travel photography game, this post is a must-read. Thanks for sharing such practical advice!
Imagine embarking on a global adventure without ever leaving your couch! With WorldBox, you can enjoy the world tour while at home using the mobile. This innovative platform brings the wonders of the world right to your fingertips, allowing you to explore iconic landmarks, vibrant cultures, and breathtaking landscapes from the comfort of your living room.
Sharing the experience, many users find the app convenient and easy to navigate, with regularly updated content to keep things fresh. The technewztop app image quality is generally impressive, making it a fun way to customize your screen and bring a personal touch to your device.
For anyone getting into mobile videography, Alight Motion stands out for its user-friendly interface combined with robust editing tools.
Renee, your article was very informative! I’d suggest checking out some photography books as well. You can download a great book’s PDF from ‘oceanofpdf.co.uk’—it could add even more to your knowledge and skills. Thanks, and best of luck!”
Takipcimx is a platform designed to help Instagram users boost their follower count and social media engagement.
Sonic Combo menu offers complete meal deals consisting of a main item, a complementary side, and a drink. It provides a more attractive price compared to when each item is bought separately.
Consider taking a series of images to convey a broader narrative of your experience.
Lightroom is a best photo editing app for traveling photographs.
Great tips, Renee! I’ve been using the golden hour advice, and it really makes a difference. For all my travel photos, Terabox has been a huge help with its free 1TB storage. Super convenient for backing up and accessing pics on the go!
These expert tips on taking better travel photos are incredibly helpful! Capturing the essence of a location makes a trip even more memorable. Speaking of memorable experiences, when you’re out exploring and need a quick, tasty meal, Sonic is a great option. With a wide range of choices like burgers, shakes, and tots, it’s perfect for a quick stop. Plus, Sonic prices are budget-friendly, making it easy to enjoy delicious food without spending too much, so you can focus on snapping those amazing travel shots!
I really appreciate how you’ve taken a deep dive into this subject. Your writing made it easy to follow, and I’m walking away with so many actionable takeaways.
AnimeSuge continues to earn its place as one of the most popular and beloved platforms among anime fans worldwide.
This article very informative please keep sharing
Informative blog post thanks for sharing
Thank you so much for your kind words! I’m thrilled you’re enjoying the photography tips. Black and white photography is a fantastic way to capture emotion and mood, especially in travel photos. If you have any specific questions or need further recommendations on techniques or gear, feel free to ask! Happy shooting!
While travelling stay at the best hostels.
Do edit your travel photos with the best editor wink apk.
Your photos looks damn amazing. I always make sure to find good lighting and use unique angles to capture my travel photos. I also enhance them using PicsArt, which has amazing editing tools for adjusting colors and adding effects. It makes my photos look more professional without much effort!
Thank you for this fantastic guide on taking better travel photos! Your expert tips and personal insights are incredibly valuable, and I’m excited to apply them to enhance my travel photography.
Well said keep it up
Enjoy the world tour while at home using your mobile phone. Yes Dude Theft Wars provides you with the experience of a world tour
Nice idea it helps me when i am trying to edit images for my websites.
by the way i have a craze for photograpphy
Enjoy the world tour while at home using the mobile. Yes WorldBox provide you an experience of world tour. such a amazing article .
Mastering travel photography isn’t solely about expensive gear; it’s about leveraging the right tools effectively. Even with just a smartphone, understanding composition and lighting can yield incredible results. However, for those serious about enhancing their craft, investing in versatile apps like Alight Motion can unlock a world of creative possibilities. With its advanced features tailored for on-the-go editing, Alight Motion empowers photographers to achieve professional-level results effortlessly. If you want to level up your photography and take better travel photos and videos, visit our website:motionalightapk.com
Watch Anime Online, Free Anime Streaming Online on aniwatch
Discover the magic of capturing amazing moments with PicsArt, the ultimate Android app for enhancing your mobile photography. Download it for free and unlock endless creative possibilities. Explore new horizons, push your boundaries, and watch your skills soar over time. Your journey to capturing breathtaking travel photos starts here. Share your experiences and insights in the comments below—I can’t wait to hear about your photography adventures! Visit picsartszone.com now for more information.
my childhood passion is photograpgy
Enjoy the world tour while at home using the mobile. Yes WorldBox provide you an experience of world tour
Well Said & Great Achievement.
Gosh, I love your website! And your photography tips. I’m hoping to get into B&W photography and would love to take better travel photos. Your tips and equipment recommendations are excellent. So glad to find you on the interwebs!
I love this so much Renee!
You’ve gone into so much amazing detail which is so so sooo helpful!
I’ll have to go over this again as its amazing and there definitely is a lot to learn and take out with me on my next trip with my camera!
Thank you!
With Jojoy, you can skip annoying ads and unlock bonus content.
you said so nice